WARNING!!! Ok this is going to be a LONG post so if you're going to stick around then you might want to grab a cuppa...
Right, that's better. Now I'll get started! Have you ever thought about doing something and NEVER gotten around to doing it? Sounds familiar... yeah well that's me all over! So I've thought about making a patchwork quilt but have NEVER gone past the 'thought' bit until now! Well, when I saw my teamie Liza at Cupcake Craft Challenges had chosen 'Patchwork Quilt' as the theme for our challenge this week then I just had to bite the bullet and throw myself into it! I've started small as I'm not best friends with my sewing machine so I didn't want to bite off more than I could chew (how many times have I given up on projects that were just a little too ambitious... cross stitch comes to mind...) Anyway, I had to head to Montmartre to buy my material, there's loads of fab textile shops there (any excuse to go to Paris lol)!
To start with I made a template for my 'squares' from thick cardboard... it measures 14cm x 14cm, but you could do any size really depending on the size of the quilt. Now I read on the web that you can prewash fabrics (as there may be some shrinkage) before you start, but the rule seemed to be either you wash ALL fabrics to be used or you washed NONE... I went with the later option. I chose 7 different fabrics, all cotton, and started to cut my squares. I cut 63 squares in total, 9 of each fabric. At this point I must stress that you have to cut the squares very accurately, they MUST all be the same size!


Once I'd finished cutting I laid my squares out on the floor in a random pattern (although I did one square of each fabric on each row).

When I was happy with the design, I started to sew the squares together, one row at a time making sure that ALL the hems were of the same size. This is really important bacause when you come to sew the rows together if the hems or squares are not the same size then the 'patches' on your quilt won't line up (if you know what I mean). Once the squares were sewn into rows I ironed (oh I know I hate it too) each row so that the hems were flat and facing the same way (or you could open the hems out and iron them flat like this instead). You then need to sew all the squares together, row by row.

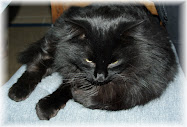
Now, you need to cut your material for the back of the quilt and the filling (called wadding or batting) to go in the middle. I chose a plain cream cotton for the back and a thin wadding. These must be cut an inch or two larger than the patchwork front, as they'll be trimmed to size later. You begin by laying down the backing material, wrong side facing up, on the floor. I stuck this to the floor with masking tape so there was no creases etc. I then laid the wadding on top, which is when my little cat decided that it made a rather cosy bed for him... ah he is a cutie. With the cat safely removed, I then laid my patchwork on top, right side facing up.

To keep everything in place, I used safety pins and pinned all the layers together working from the middle outwards, making sure it was smooth with no wrinkles and creases. This is what it looked like at this stage...

Now it was time to coax the sewing machine into doing what I wanted it to do... I did say we weren't the best of friends the sewing machine & I... starting with the outer hem I hemmed all the way around the quilt to hold everything in place. I then stitched diagonally across the squares to make it more secure and give it a more quilt-like look. Once finished I carefully trimmed all the excess backing material and wadding so that the edges were neat and looked like this...


The final part is to attach the binding to the edge of the quilt. I used one long piece of binding, enough to go around the whole quilt. I started by opening out the binding and putting the right side of it to the right side of the quilt. I then stitched this all the way around using a running stitch. To finish off I turned the binding over the edge of the quilt and then hand stitched this to the back of the quilt with invisible stitches (well a man on a galloping horse wouldn't see them). This bit took AGES, and it's only a small quilt (the finshed quilt measures 120cm x 87cm). You could also do this bit on the sewing machine to save time, but you'd see the stitches.

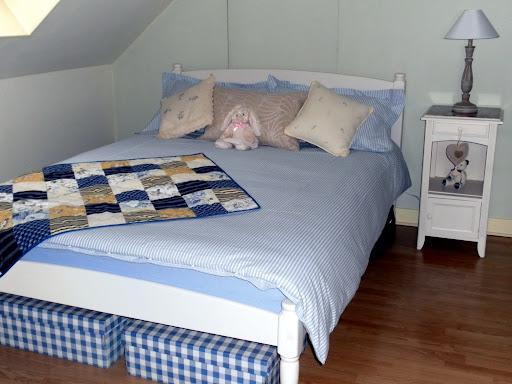
And here's the finished (mini) quilt in my home. I have to say for my first attempt I'm really pleased with my efforts! It took a long time to do but was definately worth it! A great little quilt to snuggle under on the sofa when watching tv this winter!

Now if I can make this anyone can... I have to say I'm now friends with my sewing machine and we plan to meet again soon ;) This small quilt would be idea for a baby's cot, and so cute!
Challenges I'm entering with my quilt:
By the Cute & Girly - All things bright & beautiful
I hope you haven't all fallen asleep by now as I must tell you to visit Cupcake to see the other fab projects my DT buddies have made for you to feast your eyes on! There's also some super sponsors offering prizes! This week our sponsor is Simon Says Stamp who are giving away a $20 Gift Certificate. And our monthly Icing on the Cupcake sponsor is Bunny Zoe's Crafts who has a £15 Gift Voucher up for grabs! Also we have another Choose the Challenge Competition coming up on WEDNESDAY... watch out over at Cupcake for the details!


14 comments:
Oh, this is so beautiful Shelly, well done!
Warm hugs
Maarit
Shelly, mais tu es une pro de la couture ! Je te félicite pour ce beau travail, vraiment, j'admire, et il n'y a pas que moi qui apprécie hihi, Réglisse aussi ;-))
Bisous venteux, brrr ! Mais il a fait beau ce week-end, c'est déjà bien !
Hi Shelly and wow this is so pretty I have always fancied having a go at this and even have the fabric but just never got round to it
Hugs louise xx
Fallen asleep??? No way! Your quilt is gorgeous!!! I can't believe you actually made a quilt! What a lot of work and effort, thank you for all the explanation, great tutorial!!! I love your patchwork quilt!!! Have a lovely evening! Hugs Delphine xx
Wow Shelly, this is gorgeous, I love how you have taken the theme literally!! Great work and you must be so proud of yourself!
Liza x
Wowee Shelly this is amazingly gorgeous. Have a great week. Great big hugs Jane x
Oh my lord shelly!!! You have taken this challenge to a hole new level!!!!! That is amazing!!!!! I lovehow pretty it looks, the lovely coloours and how lovely it looks in that beautiful room!!!! Have a fantastic day sweety! Hugs and sunshine!
WOW, WOW, WOW Shelly your quilt is beautiful and brilliant for an first attempt! Go you!!! I love your choice of colours/fabrics and I have to say I'm also rather envious of your gorgeous bedroom...thanks for sharing all your piccy's must have taken ages to put the post and the quilt together...well done you :) Donna ♥ x
Minxie!! Wow! I cannot believe you made this quilt in the time Liza's Challenge was up for. I am SERIOUSLY impressed by that and how awesome the finished result is. Not only that, but I want to sleep and live in that room. When can I come? I'm fully house trained!! xxx
Magnifique Patchwork! Quelle patience tu as! un grand bravo! j'adore ces couleurs et la chambre à l'air bien "Cosy" ainsi ; on a envie d'y dormir! lol! Bisous!!
It looks simple enough when someone else is doing something, but let my fingers into that-and I'll ruin a whole bunch of good stuff! )) (Just like in scrap too!)
But, your work is AMAZING Shelly! I am proud of you girl, you have patience and just all around golden hands!
Oh this is beautiful Shelly.
luv
Debby
Wow, wow, wow, you put in so much work and your quilt turned out beautifully. I'm glad you decided to remove the cat though, it would have been far too lumpy with that stuffed in there.
Thanks for joining us at the By The Cute And Girly challenge this month.
** Kate **
Shelly this really is the most gorgeous quilt......it really is so so beautiful hunni.
Lotsa hugs Vicky xxx
Post a Comment